Converting a DEC Keyboard LK401 to a USB Keyboard
DEC Keyboard LK401 has serial interface, 4800 Baud, 8N1. See more information on the keyboard hardware here.
The keyboard is solid and heavy, has superb tactile keys and is of the old 80ies quality. That you simply cannot order on Amazon or so.

For a long time, the keyboard was supported by the Linux kernel, but this time is gone.
My idea: connect the keyboard to a microcontroller that can connect to a PC via USB.
Possible Controllers:
- Arduino e.g. Arduino Micro
- Teensy
- Raspberry e.g. Zero
All microcontrollers mentioned are below 20€. I decided to use an Arduino Micro, because I already have some experience with Arduino Platform.
Arduino Micro
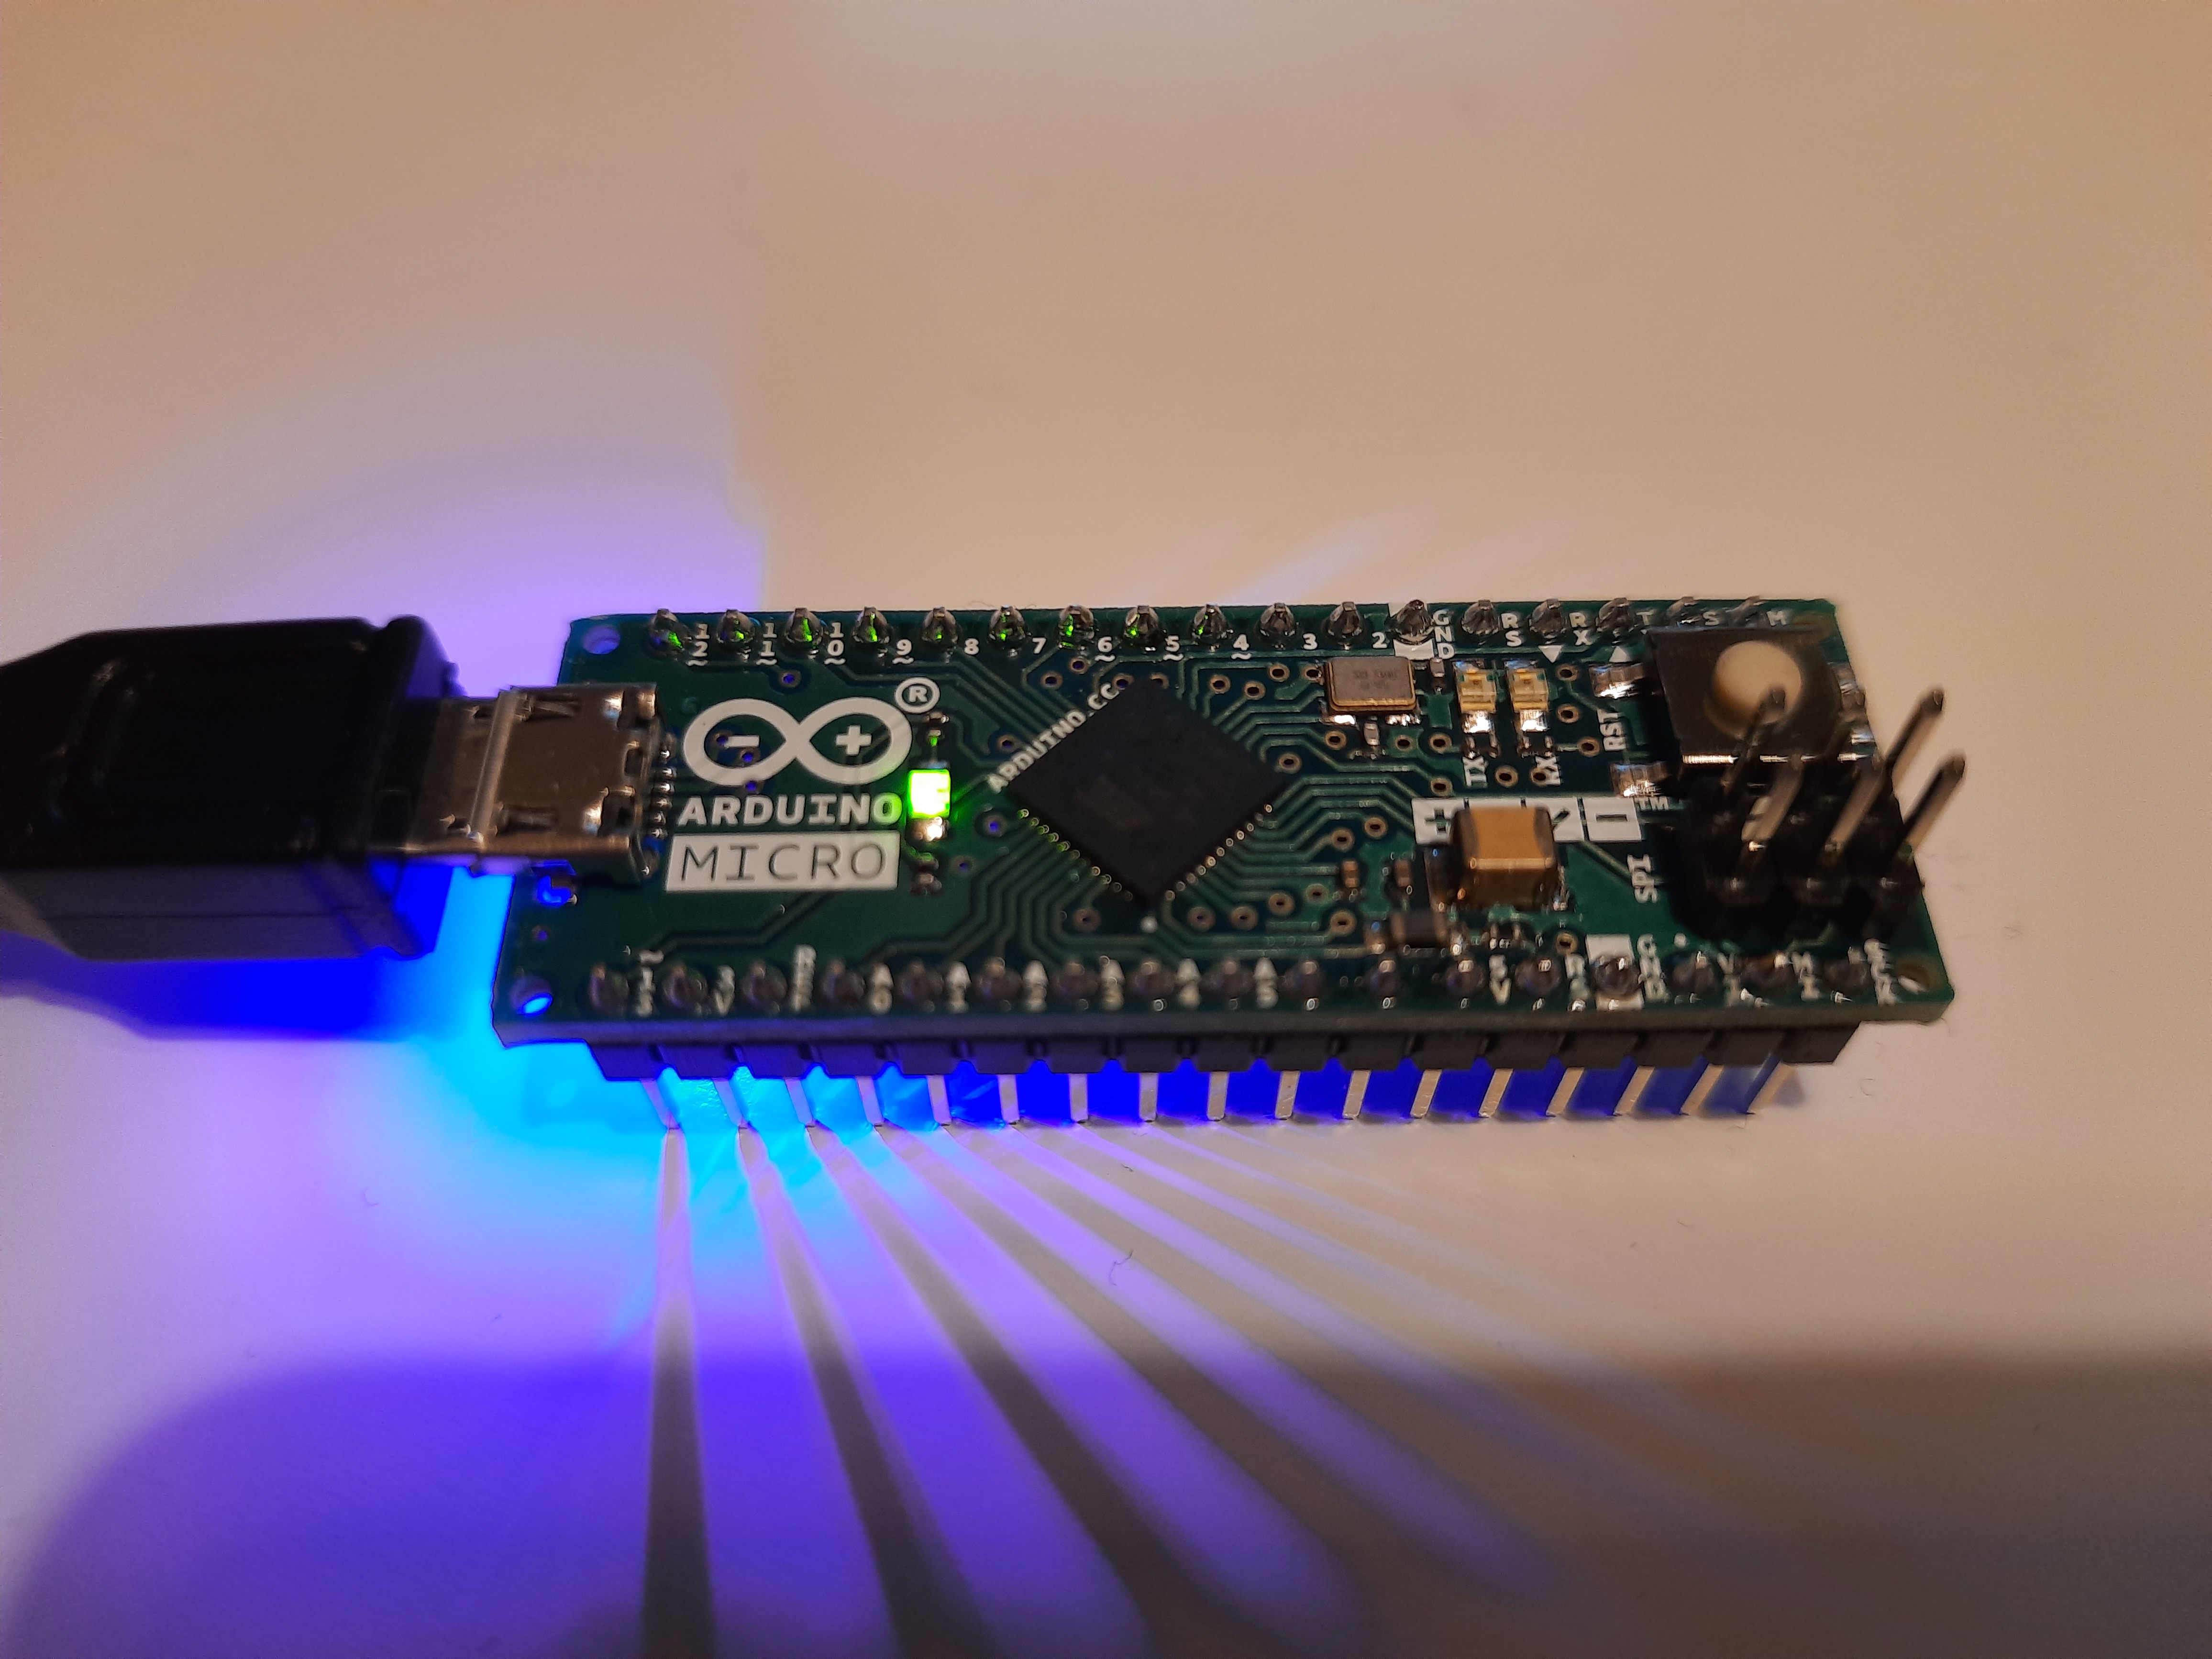
Arduino Micro uses the ATmega32U4, which has onboard USB support for USB devices. So it can emulate things like keyboards, mice, joysticks.
Infos on Arduino Micro: https://store.arduino.cc/products/arduino-micro
Pins: e.g. here: https://forum.arduino.cc/t/arduino-micro-interrputs/530588
Scheme: Link
Arduino Micro as a USB Keyboard: https://www.arduino.cc/reference/en/language/functions/usb/keyboard/
DIY project: https://janbpunkt.de/2017/10/21/ezeebox/
Hardware
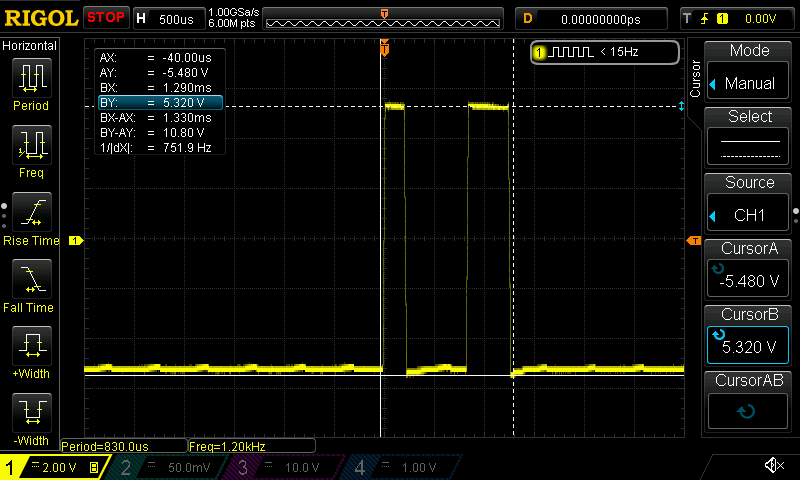
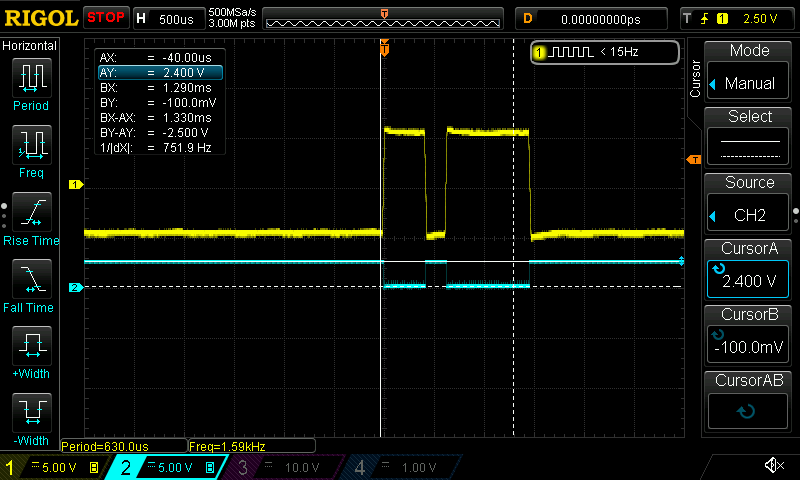
Signal looks like the image below, which shows a single character,
so we have values of about -6 volts for a ‘1’ and +6 volts for a ‘0’.
The keyboard was powered with 11.0 volts during the measurement.
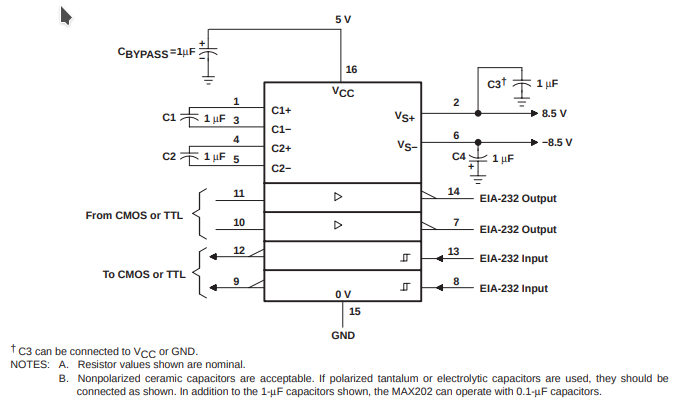
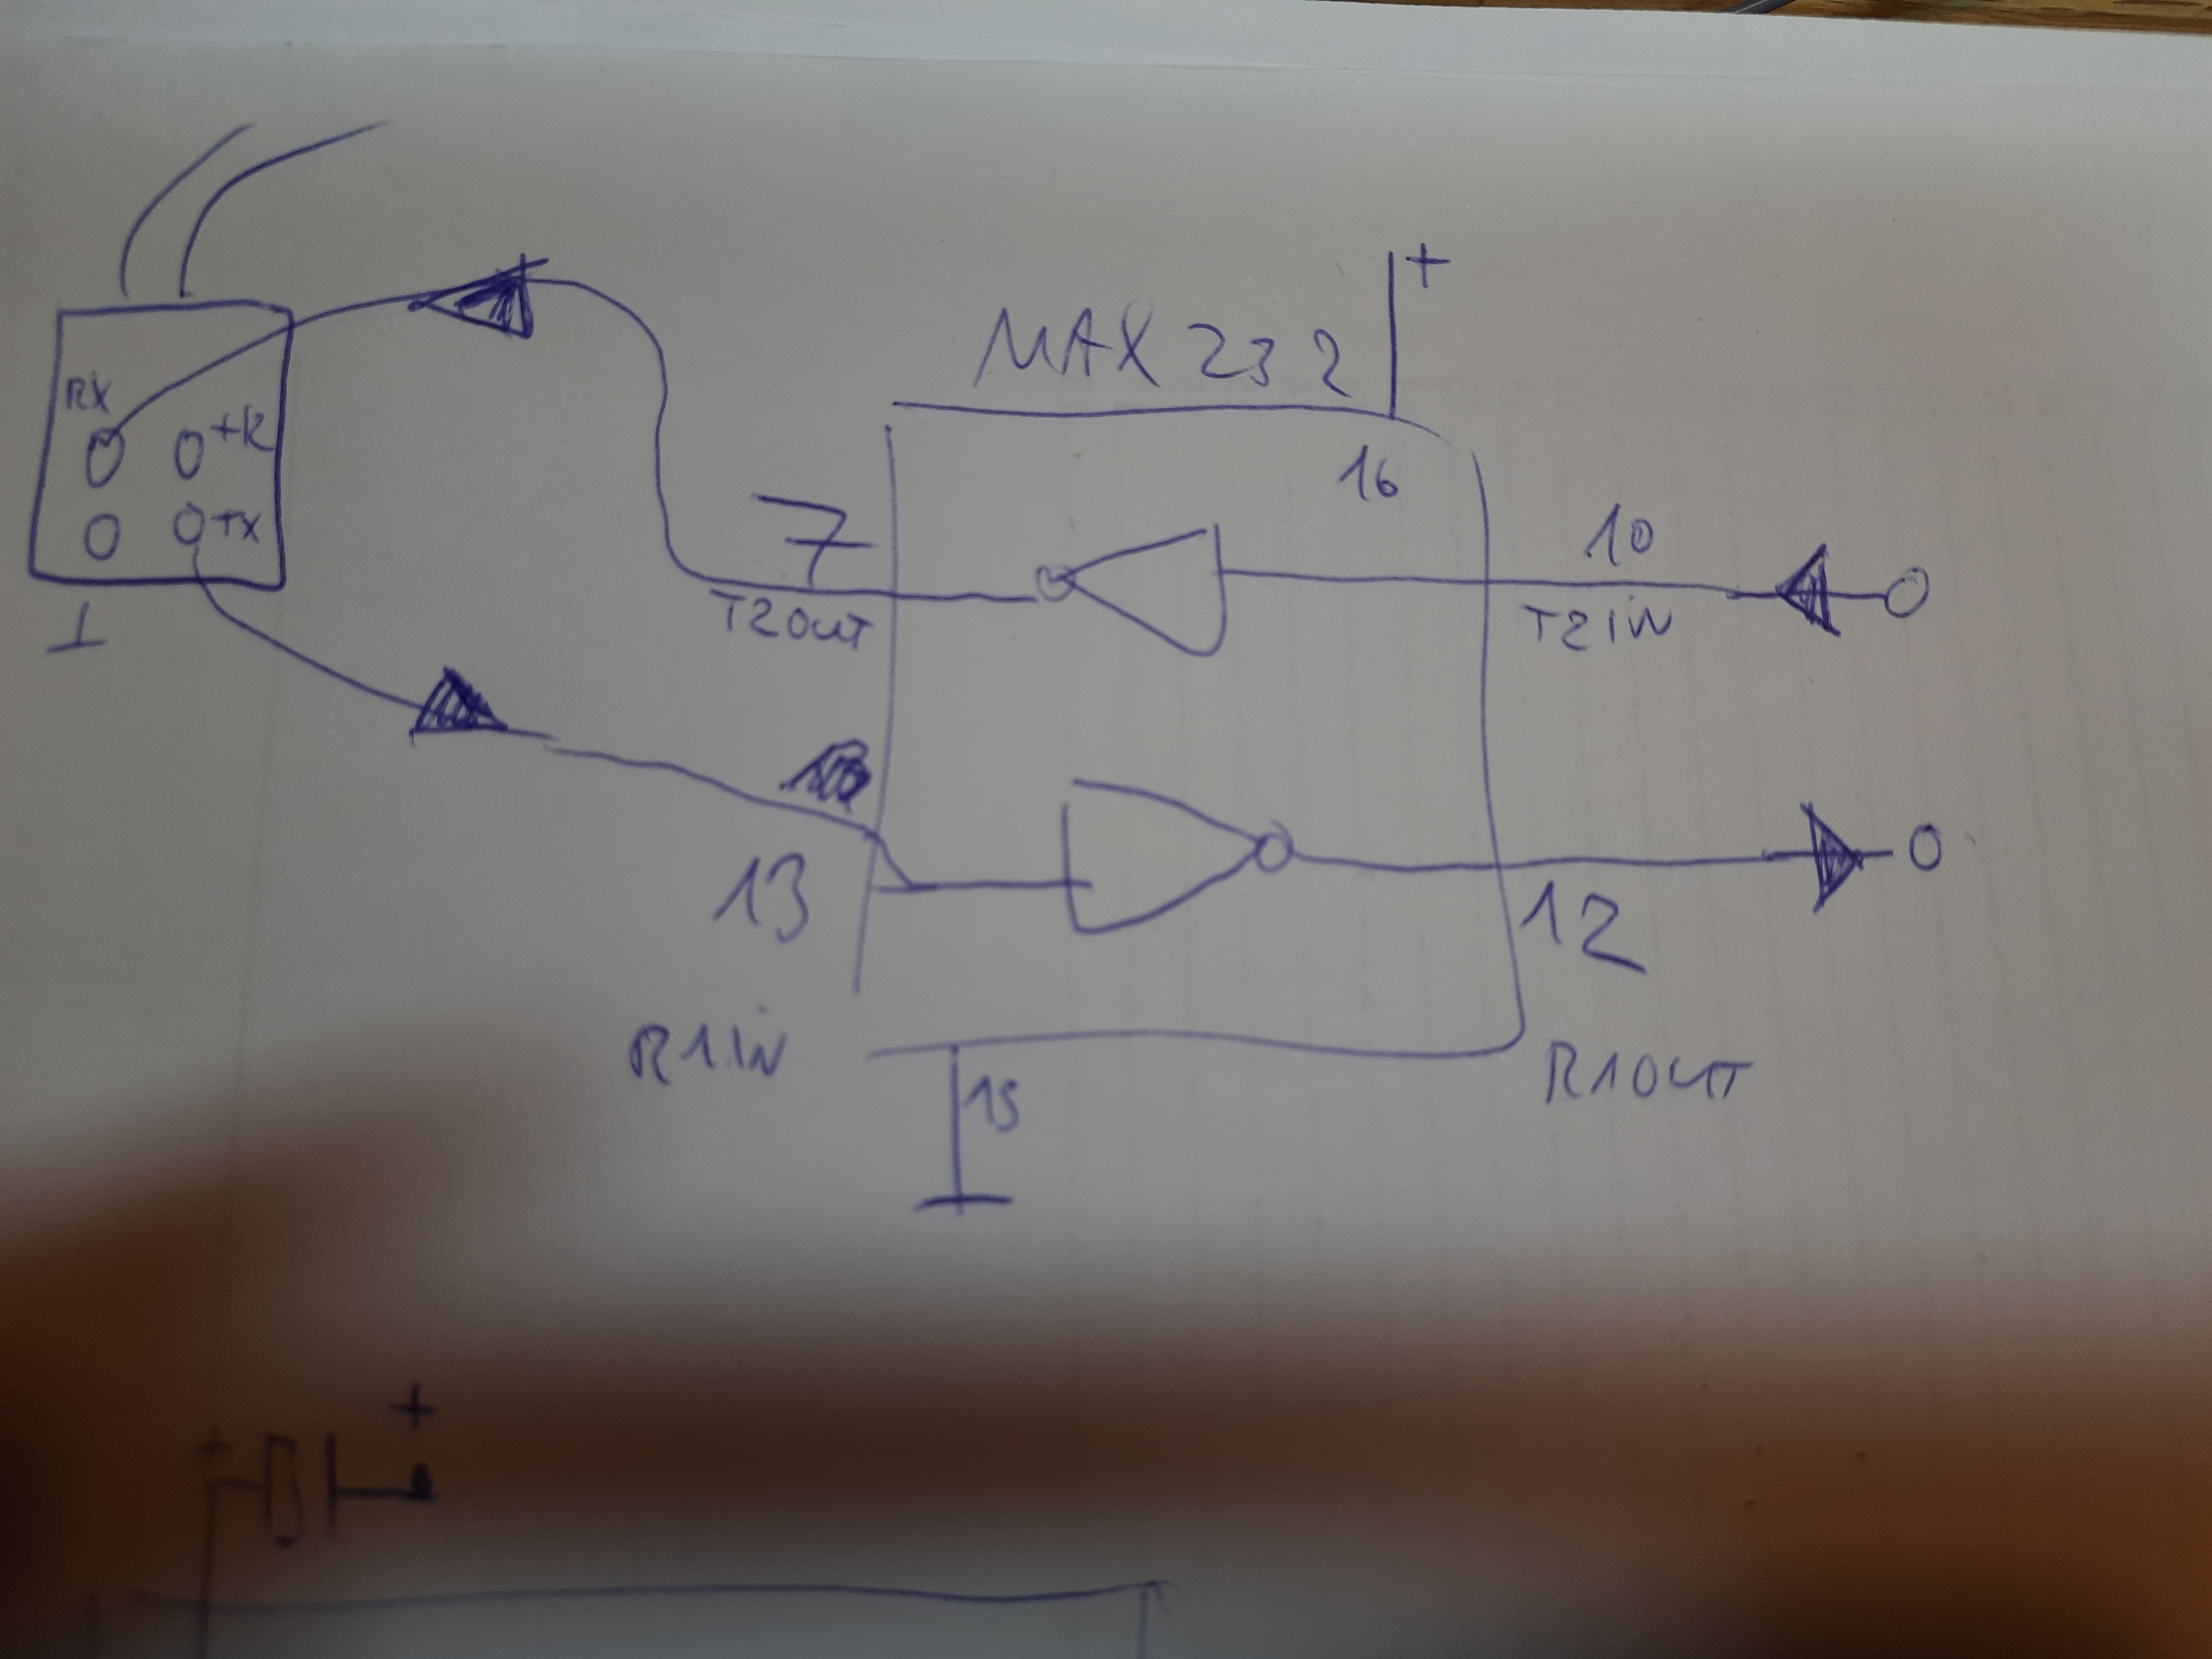
Adapting voltage levels with a MAX232
To adapt voltage levels, we need a chip like the MAX232. The following scheme from the datasheet shows how to use the chip.
After setting up the scheme, the original signal (yellow) is converted to the new signal (blue) in the screendump below. The blue signal is inverted and has 0 volts for 0 and 2.4 volts for 1 which is enough to drive the Arduino.
Scheme used:
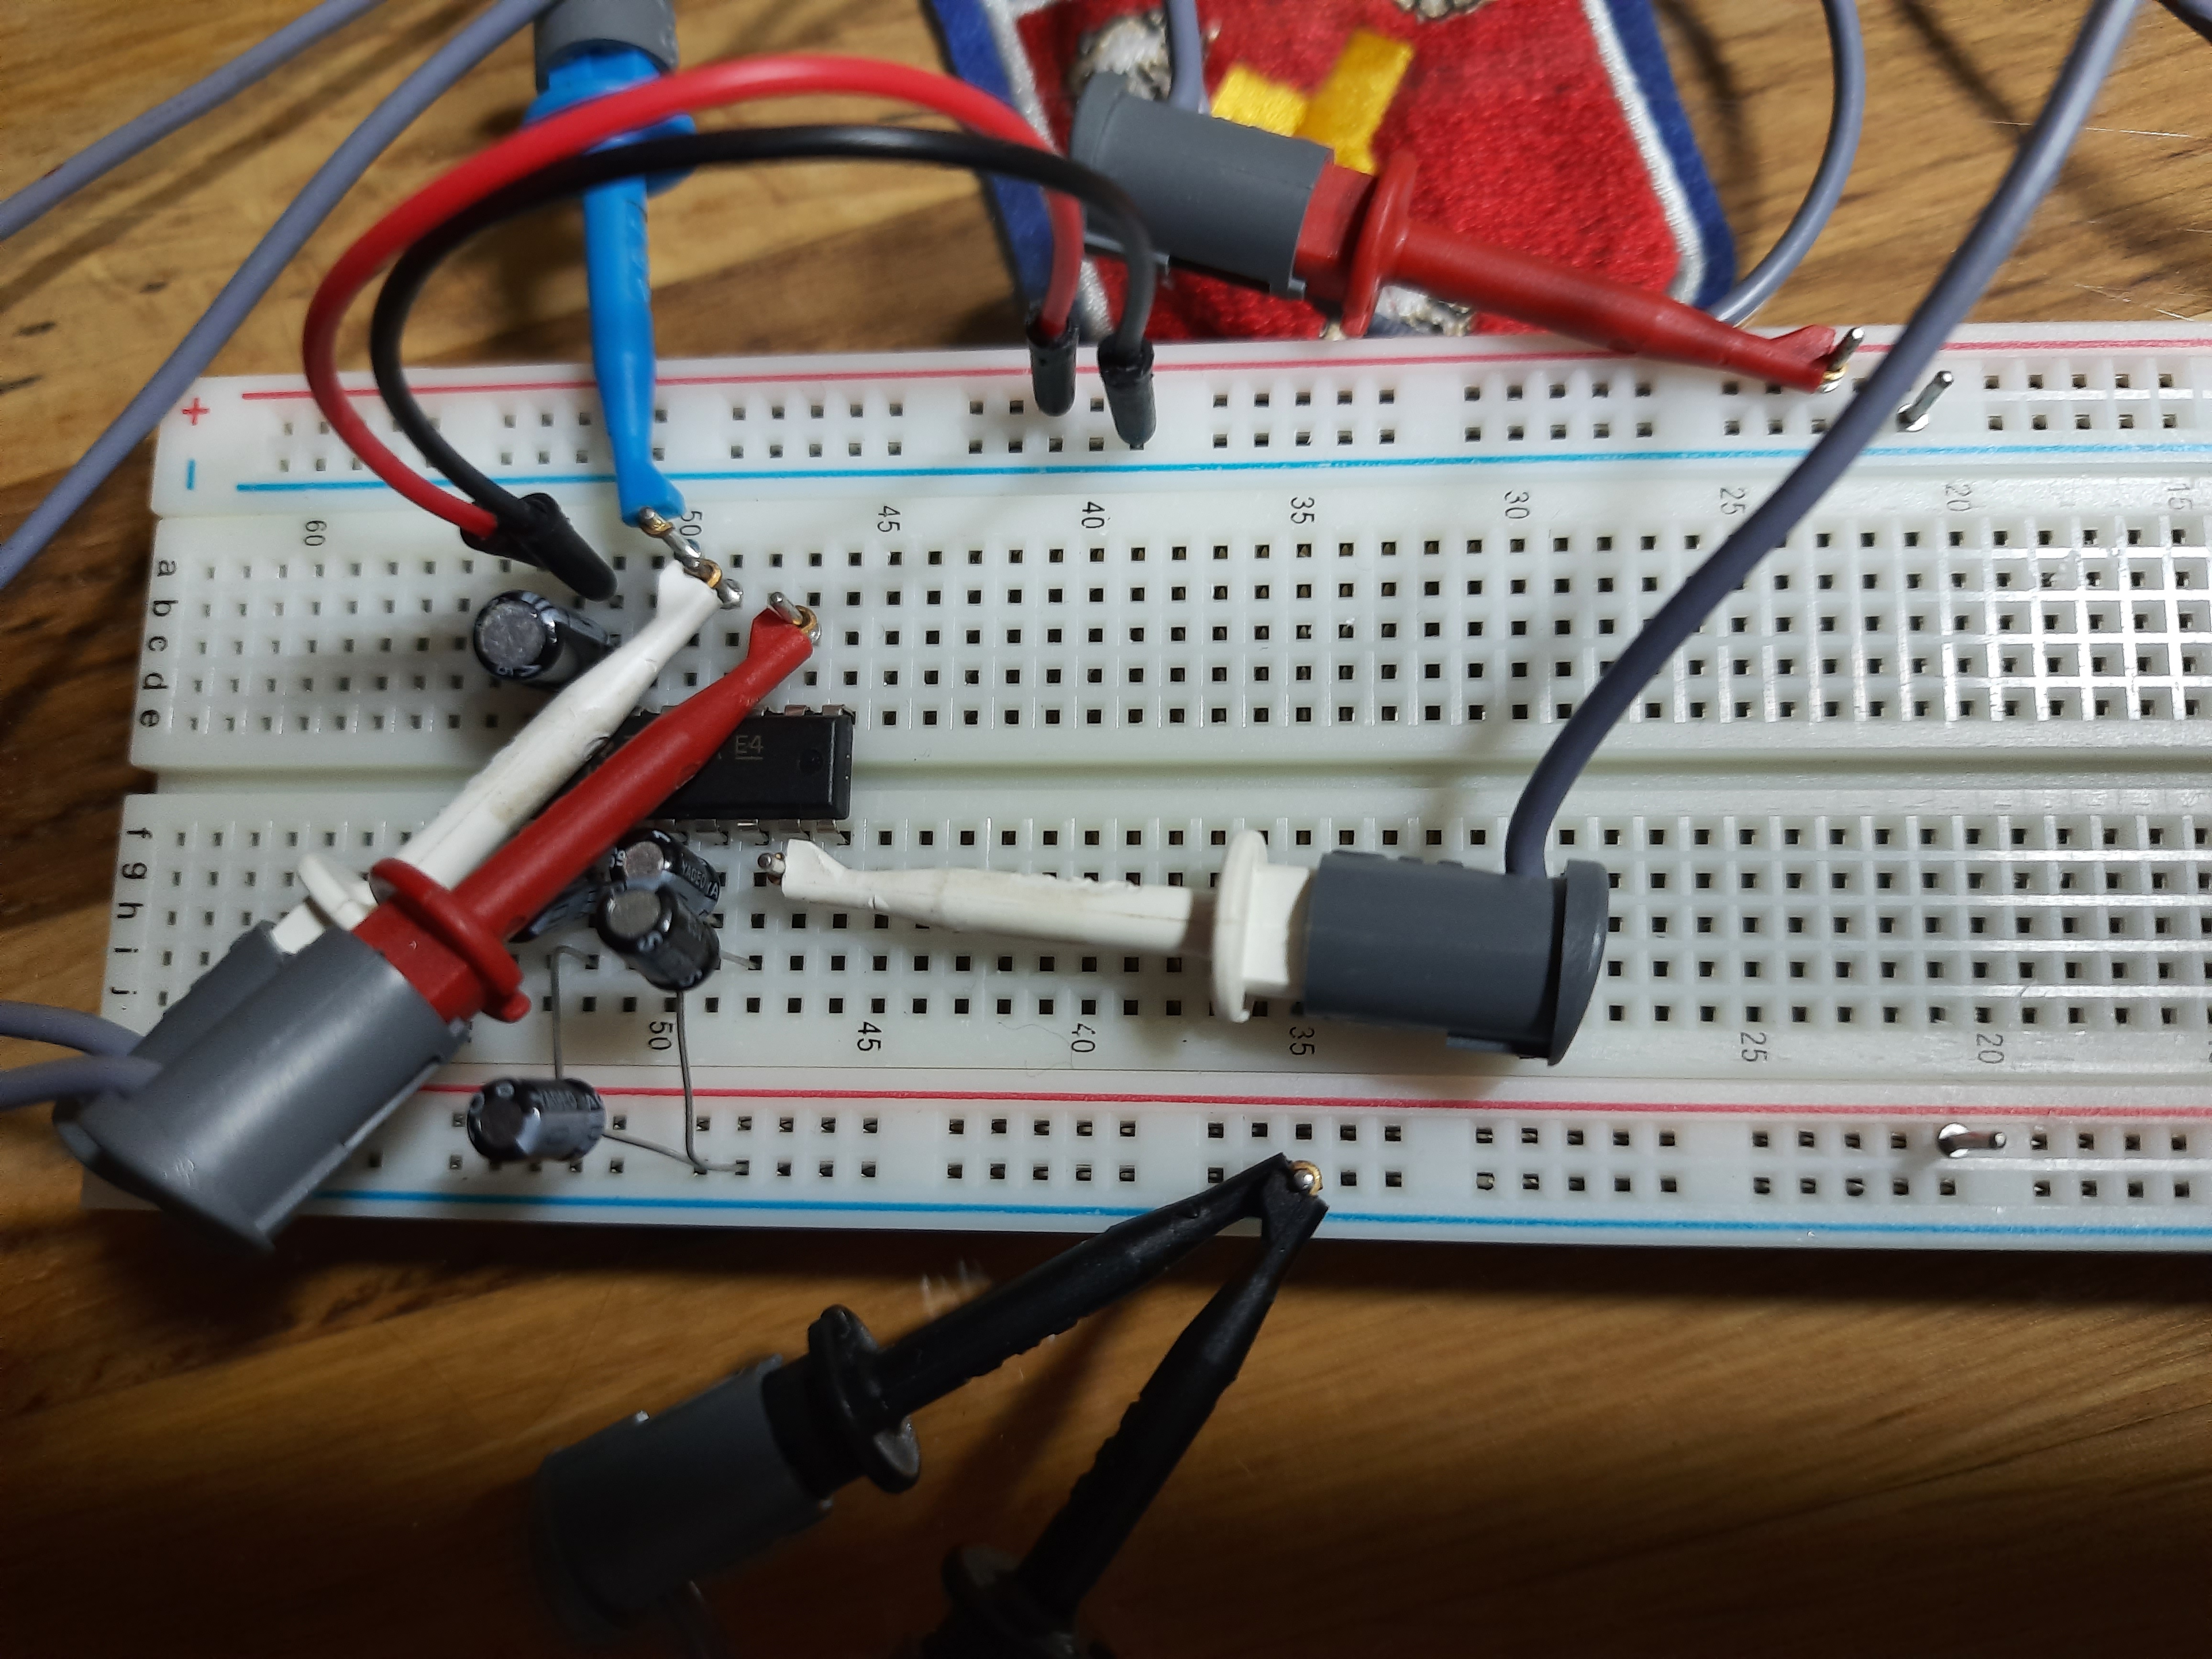
Setting up the scheme on a breadboard:
Improving the prototype:
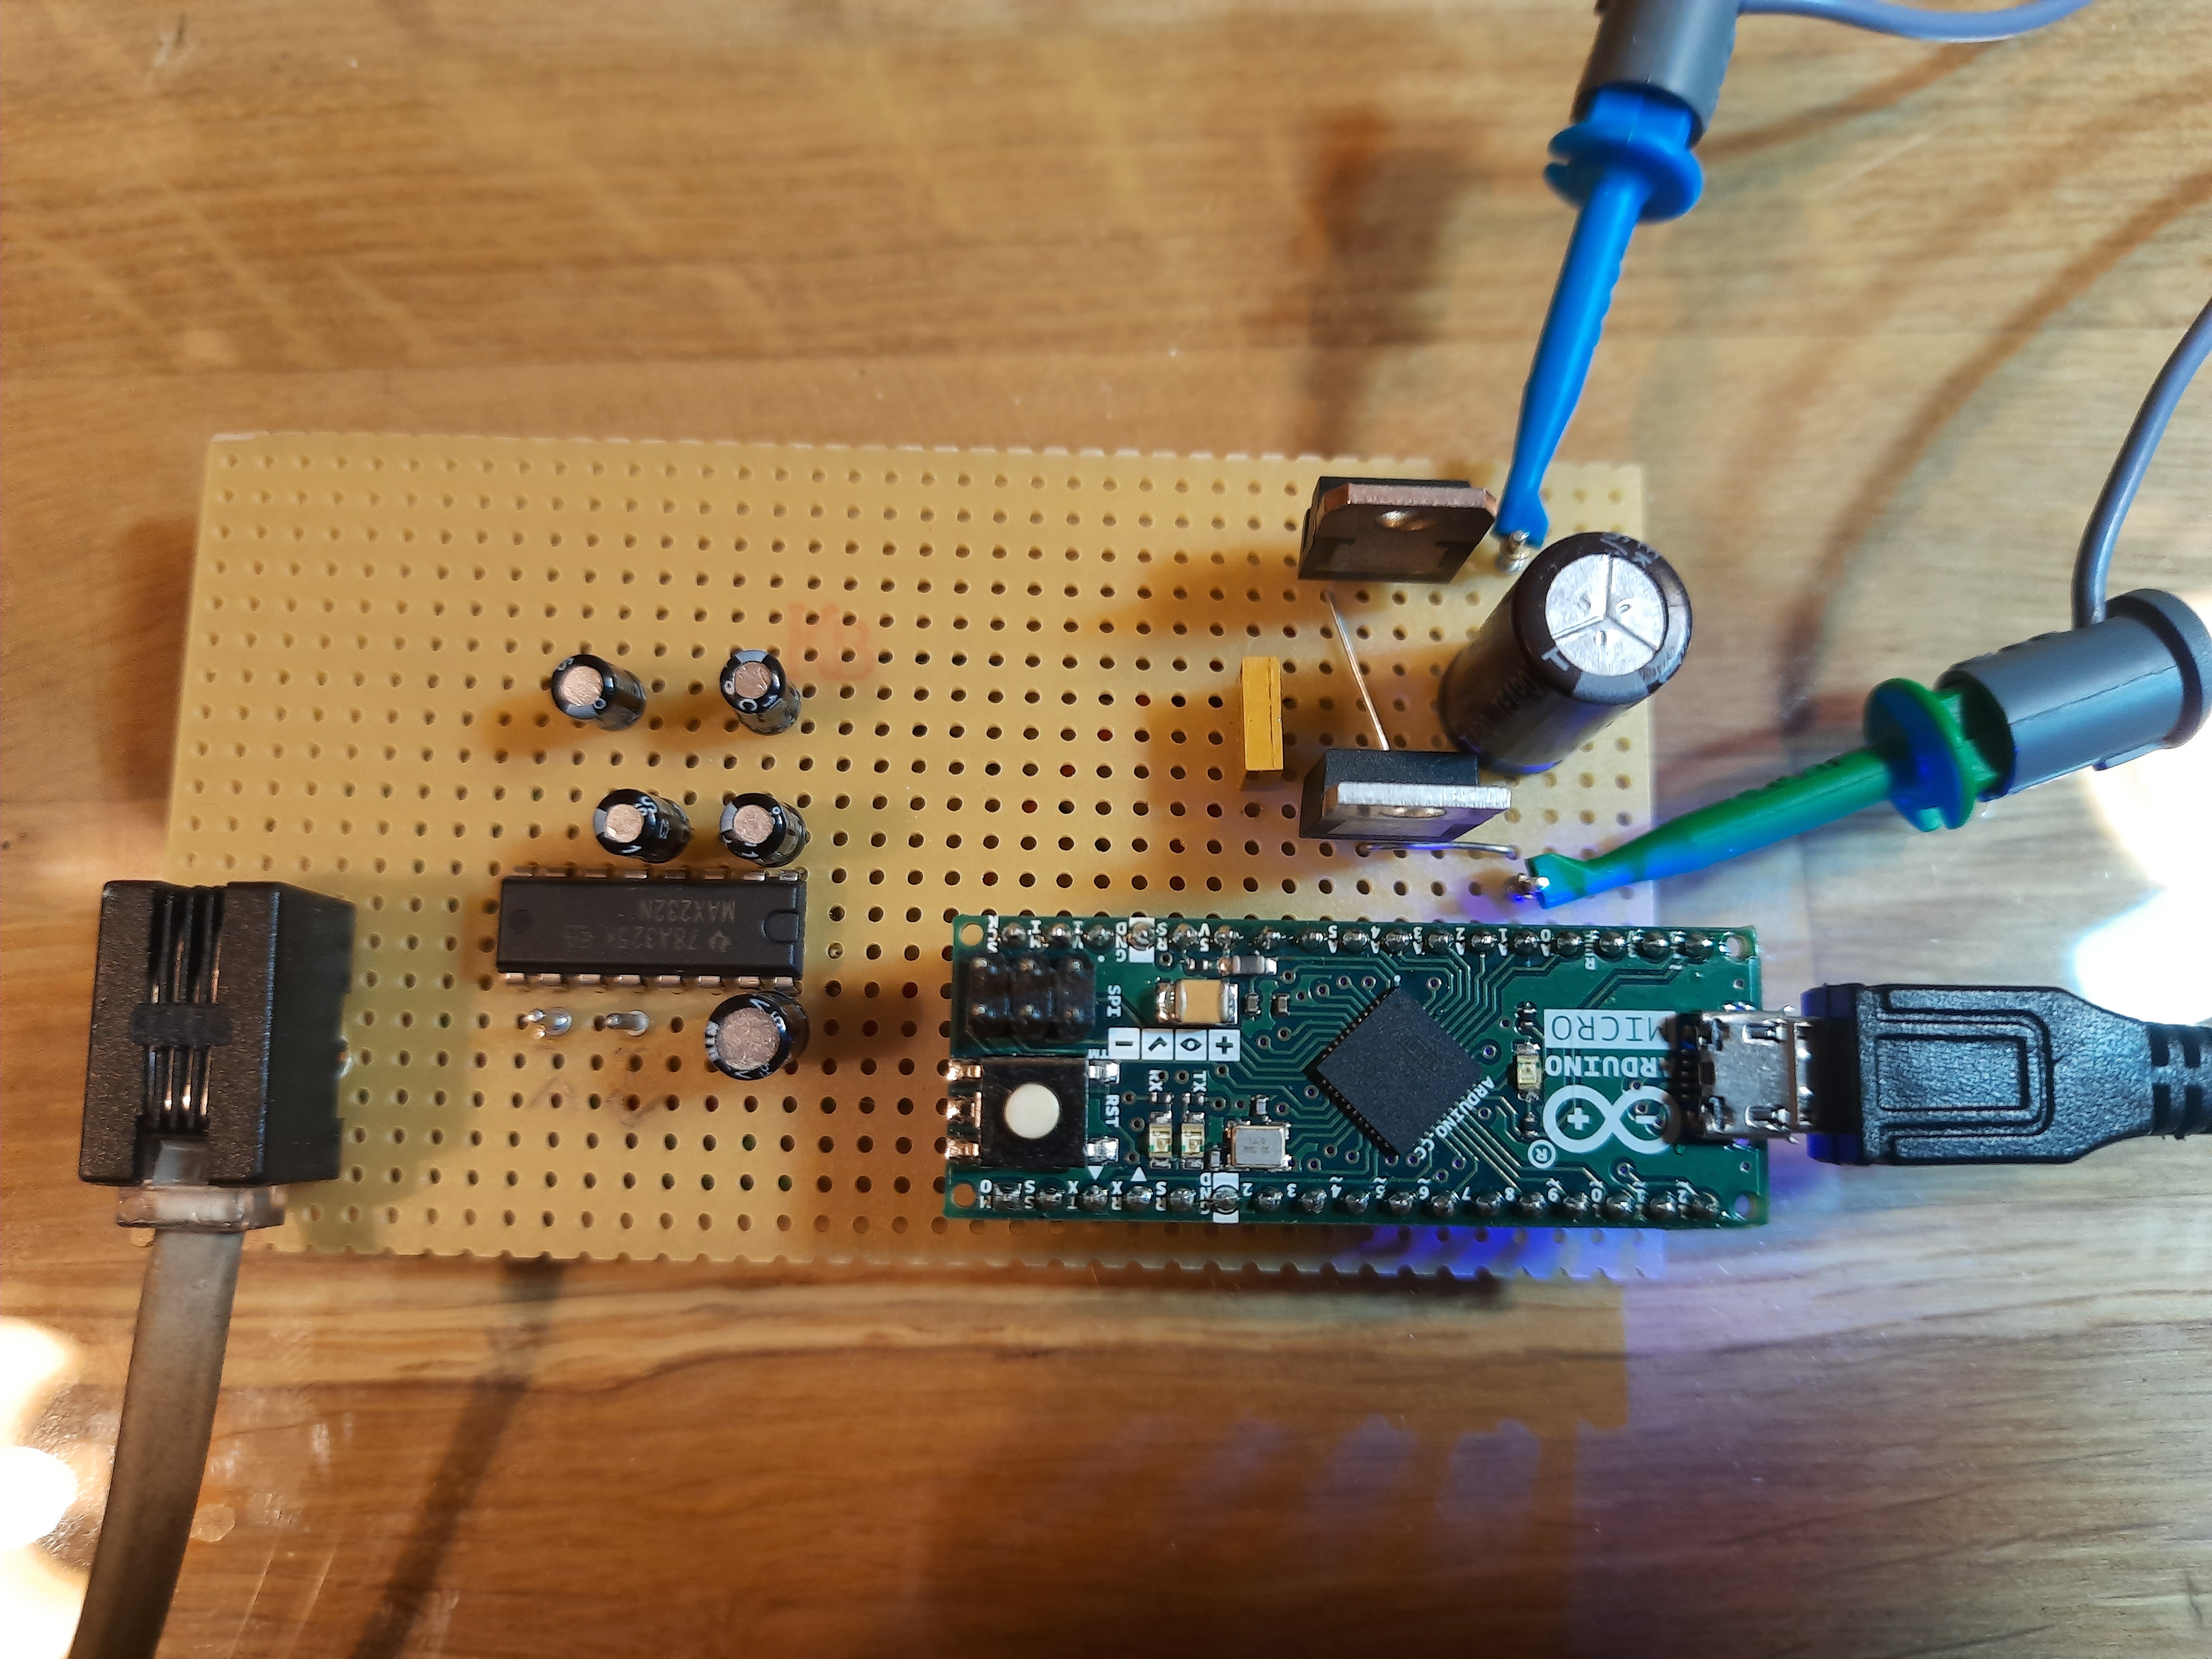 The improved prototype integrates all parts on a single board.
On the board, you can see the keyboard connector (bottom left),
the MAX232 scheme, the power supply (top right) and the
Arduino Micro, connected to USB.
The power supply generates +12 volts and +5 volts. The +5V could
have been taken from the Arduino, and 78xx regulators are a bit
overkill, because the complete board uses only 40 mA. But I had them for
free in my part boxes. The whole circuit needs
to be powered with about +14 volts DC.
The improved prototype integrates all parts on a single board.
On the board, you can see the keyboard connector (bottom left),
the MAX232 scheme, the power supply (top right) and the
Arduino Micro, connected to USB.
The power supply generates +12 volts and +5 volts. The +5V could
have been taken from the Arduino, and 78xx regulators are a bit
overkill, because the complete board uses only 40 mA. But I had them for
free in my part boxes. The whole circuit needs
to be powered with about +14 volts DC.
Arduino software
I’ve developed an usable Arduino sketch after some hours of debugging.
It is able to read most of the keys, can handle shift keys, control keys, shift hold and key repetition. Also, some ALT keys could be used.
It also can control the shift LED and the keyboard key click volume.
I have some old document from DEC that describes in detail the keyboard hardware and software interface to the keyboards 80C51 controller in charge. It is described as part of a big system, to find it in Internet, search for “VCB02 Video Subsystem Technical Manual” and maybe “EK-104AA-TM-001”.
In the document, search for “Appendix B, LK201 Keyboard Specification”. The LK401 is a successor of the LK201 and the technical description more or less fits to both.
Keyboard has two LEDs (Shift Hold and Lock), the key click can be set to off or 8 volume levels.
Code can be examined here: https://github.com/DennisD2/dec_lk401_usb
Special keys
Compose Character Left+Right emit a key press and release event with same
| Key | US Key | Code on press | Code on release |
|---|---|---|---|
| Shift Left | Shift Left | 174 0xAE | 179 0xB3 (All Up) |
| Shift Right | Shift Right | 171 0xAB | 179 0xB3 (All Up) |
| CTRL | CTRL | 175 0xAF | 179 0xB3 (All Up) |
| Gruppenumschaltung | Compose Character Left | 177 0xB1 | 177 0xB1 |
| Zusatzfunktion | Alt Function Left | 172 0xAC | 179 0xB3 (All Up) |
| Zusatzfunktion | Alt Function Right | 178 0xB2 | 179 0xB3 (All Up) |
| Zusatzumschaltung | Compose Character Right | 173 0xAD | 173 0xAD |
Result
I have used the keyboard for several weeks now for daily work (as a software developer).
The keyboard feels really good, I like the tactile feedback. Fingers need more power to press a key, compared to my other, new keyboards. The way the finger moves to press a key is longer, which gives in summary a more controlled way to press a key. I am not an english native, so I miss the words to express the difference.
All this text was typed in with the LK401.